


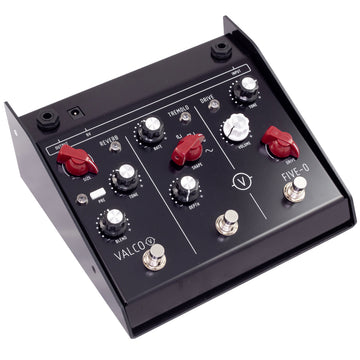
The Valco Five-O is a multi 3-in-1 pedal, containing independent Drive, Tremolo, and Reverb sections, all housed in a bombproof enclosure.
Conceived originally for giving surf in a box tones (Dick Dale/Ventures), it has become more than this through the development process its a pedal that can easily give you a one-pedal setup at a gig or session (maybe add a tuner), or it can add a whole host of extra sounds and versatility to your existing rig/pedalboard.
DRIVE– Brown Sound in its voicing/tonality, its a natural sounding/amp-like overdrive circuit. Based on the Drive section from the Valco BloodBuzz, but with increased gain. The tone control has an EQ roll-off- neutral at 12 oclock, adding high-end rolls off bass frequencies enabling biting rhythm and lead sounds.
TREMOLO– analog 4-wave tremolo, based on the original Fulltone SupaTrem circuit. The SHORT SQUARE wave allows for sharp/staccato sounds while the SINE wave offers mellow/gentle sounds, with everything in between available.
REVERB– the Five-O reverb is spring voiced at its core but with added plate reverb. Usable at all knob position extremes, its a secret weapon is the PRE function. PRE allows you to route the Reverb section to the front of the fx chain, so the signal chain becomes REV-DRIVE-TREM, opening up another world of sonic capabilities adding Trem to long Reverb tails, or feeding Reverb into Drive to bolster lead sounds, or just allowing you to get experimental and let the pedal make music!
Controls
If an AC adaptor plug is inserted, the internal battery is disconnected. Replace the battery when you detect a loss of signal output level, unusual distortion, or a dimming of the LEDs.Drive Section
TONE: Adjusts the frequency response and audio tone, with clockwise being more trebly. Bass frequencies are reduced/rolled off as the tone control is turned clockwise past 12 oclock. Treble frequencies are gradually reduced when the tone control is turned counterclockwise below 12 oclock.
VOLUME: Adjusts the output level of the drive section from zero to full.
DRIVE: Adjusts the amount of input gain (boost) before the overdrive and tone sections.
Tremolo SectionRATE– adjusts the speed of the tremolo effect. As the RATE knob is increased clockwise from the minimum position the Tremolo modulation rate increases.
SHAPE– changes the shape of the waveform that modulates the Tremolo. There are four waveshapes available to alter the tonal characteristics of the Tremolo- Sine, Triangle, Square, and Short Square (Square with a shorter Duty Cycle to make the Tremolo effect more staccato).
DEPTH– adjusts the amount of tremolo that will be applied to the signal. As the knob is turned from the counterclockwise (minimum) position to the clockwise (maximum) position, the amount of the effect will increase.
Reverb SectionSIZE– controls the REVERB DECAY time. As this control is turned clockwise, the reverb time gets longer.
TONE– controls the tone (or EQ) of the REVERB signal. As the control is turned clockwise, the sound of the reverb gets brighter. As you turn TONE counter-clockwise, the sound of the REVERB gets darker.
BLEND– controls the wet/dry mix from 100% Dry (fully counterclockwise position) to 100% Reverb (fully clockwise position). Set the BLEND to about 1 oclock for a good balance.
PRE– when activated (pressed down), the Reverb section is sent to the beginning of the signal chain (PRE DRIVE section). This has a dramatic effect on the overall sound as the REVERB is altered/affected by both the DRIVE and TREM sections (when activated). When used with the DRIVE SECTION the REVERB tail/decay is overdriven/distorted, causing it to appear louder. When engaged with the TREMOLO section, the REVERB tail/decay continues to be modulated by the TREMOLO.
Further Info.
All active components are surface mounted. PCBs and ribbons are cables used throughout. No unreliable point-to-point wiring. Lead and cadmium-free construction (RoHS).
To install or replace the 9V battery (not included), grab one of the footswitches and use it to lift the top cover of the pedal case up and swing it back. Snap the battery clip onto the battery terminals and place the battery in the spring clip at the inside back left of the housing cover. The battery is connected whenever a plug is inserted into the FUZZ IN or DRIVE-IN jack. Be sure to unplug from both those jacks when the pedal is not in use.
| Year | 2022 |
|---|---|
| Finish | Black |
| UPC | 7.31E+11 |
| Brand | Valco |
| Condition | Brand New |
Brand
Valco
Be the first to review “Valco FIVE-O PEDAL”
Related products
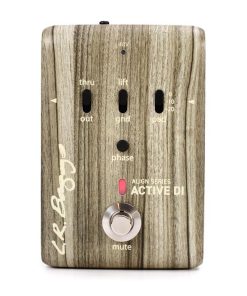
Effects & Pedals
L.R. Baggs ALIGN ACTIVE DI Align Series Acoustic Pedal Suite

Effects & Pedals
LR Baggs VOICEPRINT DI Voiceprint Acoustic DI With Voiceprint Technology EQ and Feedback

Effects & Pedals
Stagg BX-LOOP BLAXX Looper Pedal For Electric & Bass Guitars

Effects & Pedals
Effects & Pedals

Reviews
There are no reviews yet.